Choosing pella bay windows in 2026 means balancing daylight, seating space, energy performance, and installation conditions. A bay window projects beyond the exterior wall, so it can make a breakfast nook feel brighter and less cramped. But the glass area, frame material, roof or head support, and local climate all affect the final result. Looks are only part of the decision.
The U.S. Department of Energy’s Energy Saver guidance estimates that heat gain and heat loss through windows account for about 25%–30% of residential heating and cooling energy use. That figure is a useful reminder, not a promise of savings from any single replacement. Compare each available Pella model’s NFRC-certified U-factor and Solar Heat Gain Coefficient, then consider window orientation and shading. A sunny south-facing bay may need a different balance than a shaded north-facing one. Details matter.
This guide explains how to assess sizes, glass options, frame choices, warranties, and installation quotes for 2026. Product availability and specifications can vary by location, so confirm them with Pella or an authorized installer before ordering. Ask who handles structural support, flashing, insulation, and interior trim; those details can shape performance as much as the window itself. Measure twice. One honest caveat: showroom displays make finishes easy to judge, but they cannot reveal how a bay will feel in your room at 4 p.m. Take measurements, note the direction the window faces, and compare written specifications before deciding.
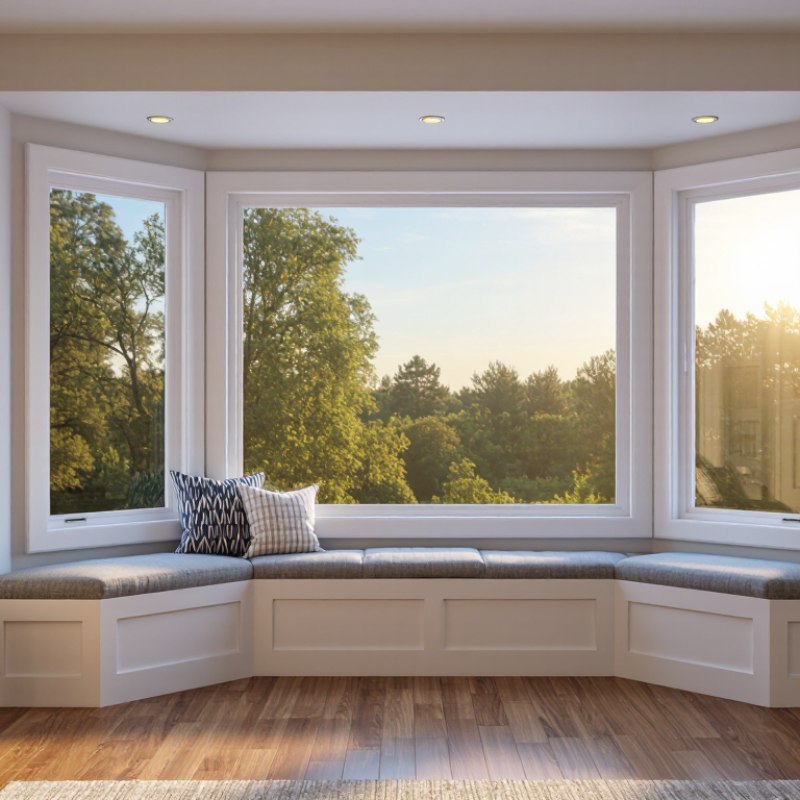
Bay windows project beyond the wall, but their layouts differ. A canted unit usually has a broad center panel and angled side panels. A box bay uses square corners, while an oriel window projects above ground level. For a three-panel layout, decide whether the side panels should open for ventilation or remain fixed. Four-panel designs offer more glass divisions but can make the view feel busier.
Projection angle changes both interior space and exterior appearance. A 30-degree angle tends to create a shallower nook; a 45-degree angle projects farther and may fit a small seat. Confirm the manufacturer’s drawings, wall depth, and available clearance before ordering. The U.S. Department of Energy estimates that windows account for about 25–30% of residential heating and cooling energy use. That makes glass performance worth checking: compare NFRC-certified U-factor and solar heat gain coefficient ratings for your climate. A larger window is not automatically brighter if nearby trees block the sky.
Tip: Tape the proposed sill and side-panel outlines onto the floor. Sit beside the mock-up, then check furniture clearance and sightlines. It may still feel tighter after installation; that’s easy to underestimate. Choose operable panels only where you can reach and clean them safely.
Choosing a bay-window layout: Three-panel bays commonly use 30° or 45° side angles, while box bays typically use 90° corners. These are common design configurations, not universal specifications; available layouts and projection depend on the window system and opening. Confirm measurements and product options before choosing.
A bay window changes more than a room’s view: its projection adds weight and can alter how loads reach the wall. Measure the rough opening, not the visible trim. Record width at the top, center, and sill, plus height on both sides; check diagonal measurements for squareness. A small mismatch matters. Note wall thickness, siding, and any signs of sagging or water damage. The U.S. Department of Energy’s Energy Saver guidance estimates that windows account for about 25–30% of residential heating and cooling energy use, making accurate sizing and proper sealing worthwhile.
Before ordering, confirm how the opening is framed and where the new unit’s weight will bear. A qualified contractor should inspect the header, studs, sill, and floor framing, especially when the window projects outward. The 2021 International Residential Code addresses headers and framing, but local editions and amendments may differ. Verify requirements with your local building department; support details depend on span, loads, and the chosen assembly. I would not assume an existing header is adequate just because the old window stayed in place.
Tips: Measure twice, and photograph the opening with a tape measure visible. Ask a licensed local professional to document required brackets or a support platform before installation. Small oversight, big repair.
| Planning Check | What to Measure or Verify | Example or Reliable Basis | Next Step |
|---|---|---|---|
| Existing opening width | Measure the inside width at the top, middle, and bottom of the opening. | Record all three measurements; an illustrative set might be 71½ in, 71⅜ in, and 71⅝ in. | Use the smallest measurement when discussing sizing. Confirm the required rough opening with the selected unit’s current installation instructions. |
| Existing opening height | Measure from the sill to the top of the opening on the left, center, and right. | Record each result separately; do not assume the opening is square or level. | Compare the measurements with the installation requirements before ordering. Do not subtract a generic allowance from the opening. |
| Opening shape and condition | Check both diagonals, and inspect the sill, jambs, and surrounding framing for movement, water damage, or rot. | Equal diagonal measurements suggest a square opening; visible damage or unequal measurements need further assessment. | Repair or have the framing evaluated before installation. A window should not be used to conceal damaged framing. |
| Projection and side angle | Measure the available projection from the wall and note the planned side-window angles and interior clearance. | Bay layouts and projections vary; verify the proposed configuration against the room, exterior clearance, and unit drawings. | Confirm the selected configuration and projection with the supplier and installer before finalizing the order. |
| Header and load path | Determine whether the wall is load-bearing and document the existing header, its span, and the framing above it. | Header requirements depend on factors such as opening span, loads, building design, and local code; there is no universal header size. | Have a qualified professional verify the structure and any required header changes before cutting or enlarging the opening. |
| Bay-window support | Identify how the unit’s weight and projection will be supported, including any brackets, cables, framing, or foundation support specified for the design. | Support needs depend on the unit, projection, wall construction, and installation method. | Follow the selected unit’s installation instructions and obtain professional review where structural support is uncertain. |
| Weatherproofing and drainage | Check the planned sill flashing, water-resistive barrier integration, exterior trim, and drainage path. | Flashing details must suit the wall assembly and the installation instructions; water should be directed outward. | Coordinate the window installation with the exterior cladding and local requirements to reduce water-entry risk. |
| Local permits and code | Confirm permit requirements and applicable rules for structural work, energy performance, safety glazing, and emergency escape where relevant. | Requirements vary by jurisdiction, building type, window location, and adopted code edition. | Check with the local building department or authority having jurisdiction before work begins. |
| Final order verification | Confirm the selected unit’s frame dimensions, operating configuration, glazing options, and installation method. | Product dimensions and installation clearances are model-specific and may change over time. | Use current product documentation and the installer’s verified field measurements; do not order from rough-opening measurements alone. |
Note: The example measurements are illustrative only, not a standard size or ordering recommendation. Verify the actual opening and structural requirements for the property and local jurisdiction.
When comparing bay-window options, start with the NFRC label for the complete window, not a glass-only claim. U-factor estimates heat transfer; lower values generally mean less heat escapes in cold weather. SHGC measures how much solar heat enters. A higher rating may help in cold, sunny rooms, while a lower one can limit summer heat gain. Consider your climate and the window’s direction.
Frame material affects insulation, maintenance, and sightlines. Vinyl and fiberglass often need less upkeep; wood can provide a warm interior finish but requires more care. Ask whether the quoted U-factor includes the frame, sash, and glazing. It should. A bay window joins several units, so compare the exact configuration, not a similar-looking sample. Small detail, big difference.
Glass packages may include double or triple panes, low-emissivity coatings, and gas fills. These features can improve thermal performance, but NFRC ratings help compare complete products on equal terms. For a north-facing room, a low U-factor may matter most; for west-facing glass, a lower SHGC can reduce late-day heat. Ratings cannot fix air leaks or poor flashing. I once focused too much on the glass and overlooked installation depth. That comparison was incomplete. Check the certified rating and written installation details before choosing.
For a bay window, start with the U-factor for your home’s ENERGY STAR climate zone. The U.S. EPA’s ENERGY STAR Version 7.0 specification sets maximum values of 0.22 for Northern, 0.25 for North-Central, 0.28 for South-Central, and 0.32 for Southern zones. Lower U-factors mean less heat passes through the window. Check the zone for your address, not the seller’s location.
Read the National Fenestration Rating Council label for the rated whole-window U-factor. A bay assembly can combine fixed and operable sections, so confirm the rating matches the exact configuration you plan to buy. The center-glass figure alone may not represent the complete unit. Small detail. Important difference.
The chart looks tidy. Real houses are not. A cold draft near the seat may come from installation gaps, not glass alone. ENERGY STAR’s limits help narrow choices, but they do not guarantee comfort in every room. Check the frame, air-sealing details, and installer’s plan alongside the rating. It is easy to focus on one number; I would still ask how the projecting sides will be sealed against wind and rain.
A bay window projects beyond the wall, so installation planning starts with structure, not glass. Confirm that the framing can support the unit and that the opening is square and level. Measure twice. The installer should detail flashing and drainage carefully; a narrow gap at the sill can invite water behind the trim. FGIA installation guidance emphasizes following the window maker’s instructions and matching installation methods to the wall assembly.
Plan ventilation before ordering. Check which panels open, how far they swing, and whether curtains, furniture, or nearby paths will block them. The U.S. Department of Energy’s Energy Saver guidance estimates that windows account for about 25%–30% of home heating and cooling energy use. NFRC ratings let buyers compare U-factor and solar heat gain coefficient across products. These figures help, but they cannot predict comfort without considering orientation, shading, and local climate.
Maintenance needs are easy to underestimate. Ask how to reach exterior glass safely, and confirm that screens, locks, and moving hardware are accessible. Inspect sealant, flashing, and drainage openings each season; clear debris with a soft brush and mild soap. Small details matter. I would also ask what routine upkeep the finish requires, since sun and rain can wear exposed trim unevenly. A beautiful projection is less useful if cleaning it becomes a yearly chore.